___________________________________________________
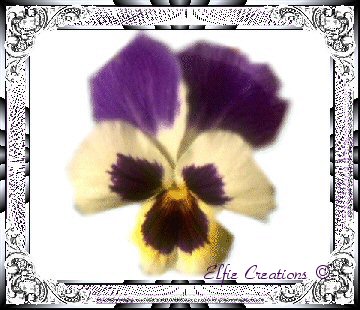
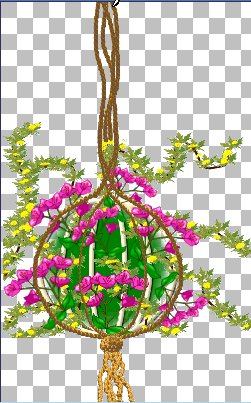
Making A Moss Hanging Planter In PSP
___________________________________________________
You will need PSP for this tutorial to get a
free trial of the latest version to play with
for 30 days download it here.
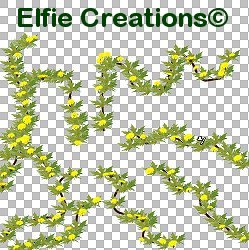
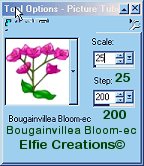
You will need my Maple_Leaf-ec, Bougainbillea
Bloom-ec, Dandelions-Small and Beads tubes
download them
here.
After you have saved them un-zip them to a
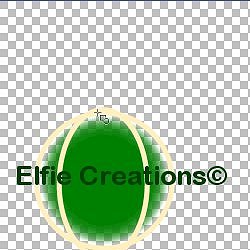
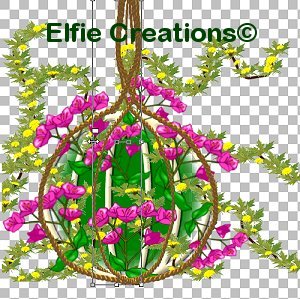
folder you will remember so you can open them
first thing.
Disclaimer:
This is my own idea any similarity to any
other Tutorial is purely coincidental.
___________________________________________________
Make the Moss Circle
___________________________________________________
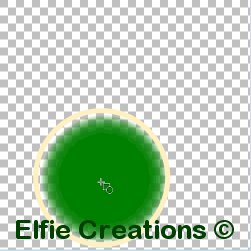
1.) Open New Image size 500 x 500 transparent 16 mil.
colors.
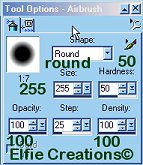
2.) Using your Airbrush tool spray a circle of
green = #008000
close to the bottom of the image
Airbrush tool set at:
___________________________________________________
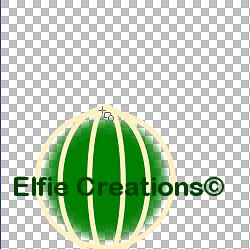
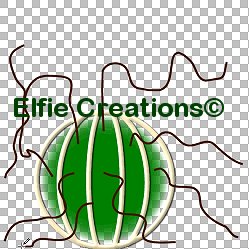
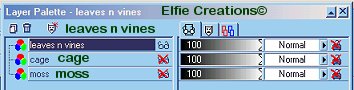
Make the Cage Circle
___________________________________________________
3.) Add a new raster layer, name it cage.
4.) Using the Shapes tool on ellipse make
sure your background is not on click on
the circle with the line through it.
Make sure your Stroke color Forground
is on a color you would like, I used #FDF3C2.
Set the shapes tool for:
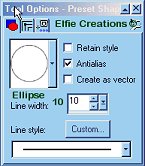
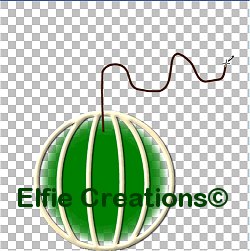
Now draw a circle around your green globe,
don't worry if it isn't right on it, just make
sure it's large enough to cover it.
Rename layer1 Moss.
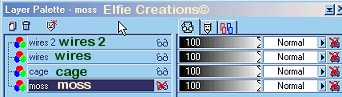
5.) If the circle is not over your green
globe use the mover tool to position
it so it is.
___________________________________________________
Make the Cage Wires
___________________________________________________
6.) Now add another raster layer, name it wires.
7.) Use the Shapes tool again on ellipse and draw
an ellipse from the top to the bottom in from
the sides don't worry about the ends going over
the edges that's what we want right now.
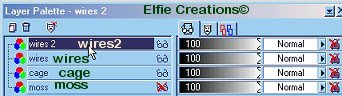
8.) Repeat 6 and 7 and make this one inside
the other one, name this layer wires 2.
9.) Now go to the layer that has the circle
on it should be cage layer use the magic
wand set at:
RGB Value
Tolerance = 0
Feather = 0
Sample merged box is NOT checked.
Click on the outside of the circle.
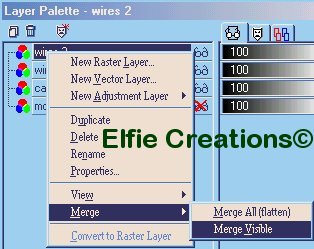
10.) Now go to the wires layer and make it the
active layer and hit the delete key on your
keyboard. This will get rid of the ellipse
that is outside the circle.
11.) Repeat 10 on the wires 2 layer. Go to
Selections/Select None = Deselect.
12.) Now blank out moss layer your green globe
layer by clicking on the layer palette eye
glasses, now right click on any other layer
and scroll to Layers/Merge/Merge Visible.
13.) Rename this merged layer cage.
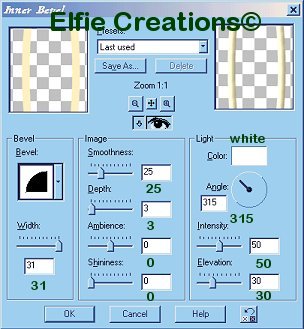
14.) Make the cage layer active.
15.) Go to Effects/3D Effects/Inner Bevel set at:
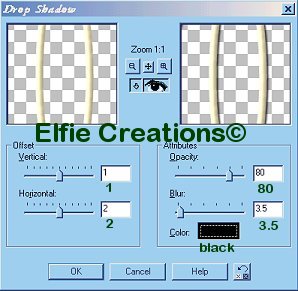
16.) Go to Effects/3D Effects/Drop Shadow set at:
___________________________________________________
Adding The Vines
___________________________________________________
17.) Add a new raster layer. Name it vine 1
18.) Using the draw tool set at:
19.) Change your Stroke/forground color to
a brown color I used #3E1700, now draw a
squiggly line up or down add a new raster
layer and repeat keep doing this till you
have as many vines as you like making sure
you add a new raster layer for each vine and
name them vine 2 through how ever many you make.
___________________________________________________
Adding The Leaves
___________________________________________________
20.) Add a new raster layer and rename it leaves1.
Using the tubes tool set on Maple_Leaf-ec.
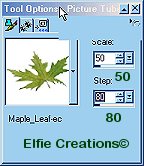
21.) Run a bunch of leaves along each vine add
a new raster layer for each set of leaves
on each vine.
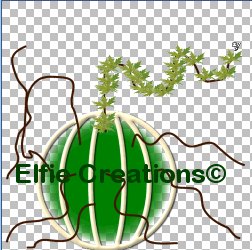
22.) Don't worry if they aren't exactly on the vines.
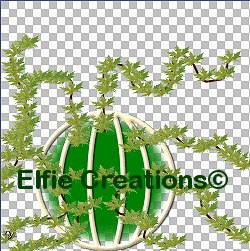
23.) Hide the green globe layer and the cage
layer now Layers/Merge/Merge Visible and
rename the merged layer leaves n vines
and un-hide green globe and cage layers.
___________________________________________________
Adding The Flowers
___________________________________________________
24.) Add new raster layer and name it flowers1
and using the Dandelions-Small set at:
(You can use any other small flowers if you like also.)
25.) Add new raster layer and name it flowers2.
Using the tubes tool and the Bougainbillea
Bloom-ec Set at:
Punch a flower in the globe, duplicate
this layer as many times as you need to
fill the globe in making sure you rename
each layer flowers 3 through what ever
number you end up with using the mover tool
to arrange each layer and flip, mirror or
rotate to fit the globe, move each layer to
the top, you may resize some of the layers
smaller, to about 75 percent make sure you
uncheck resize all layers, hide the cage,
green globe and vines, leaves & flowers layers,
layers Merge/Merge Visible, rename layer flowers2,
un-hide all. (You may use any other flower you like.)
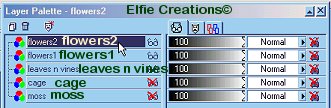
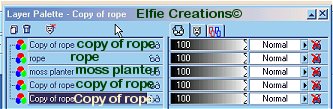
26.) Layers Merge/Merge Visible rename layer
Moss Planter and add a new raster layer
name it rope.
___________________________________________________
Adding The Ropes
___________________________________________________
27.) Using the tube tool on the rope tube set at:
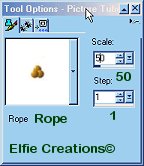
draw a rope from the bottom of the cage
all the way past the top.
28.) Duplicate this layer, three times,
mirror two layers and go to layers
arrange send two layers to the bottom
and mirror one at the bottom and one
on the top, using the Deformation tool
move the bottom layers in so you can
see them behind the planter.
29.) Duplicate the front layers and move them
in with the deformation tool and pull the
left side in on each layer.
Layers Merge/Merge Visible rename Moss Planter.
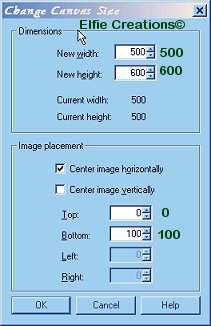
30.) Add a new raster layer. Go to Image/Canvas Size
and add to the length by 100 so it's 500w x 600h.
Uncheck Center Image Vertically and make the top
number 0 so that the canvas will be added to on
the bottom only.
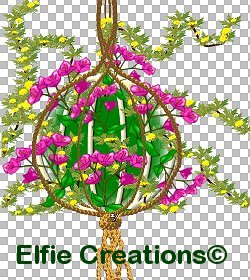
31.) Using the rope tube same as before make a
bunch of small ropes from the bottom of the
end of the other ropes make them go past the
bottom of the image after you have as many
as you like then make a knot under the bottom
of the planter, by swirling it around the short
ropes.
Merge layers and re-name layer Moss Planter again.
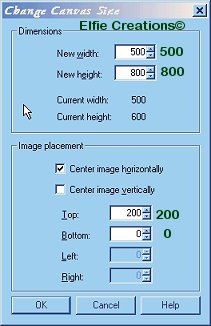
32.) Go to Image/Canvas Size 500w x 800h.
Uncheck Center Image Vertically and make
the bottom number 0 so that the canvas will
be added to the top only.
33.) Using the rope tube Set at:
Draw from the top of each rope to the
very top past the image edge on each
rope to extend them all.
___________________________________________________
Adding The Beads
___________________________________________________
34.) Add new raster layer, name it bead1.
35.) Using the tubes tool use one of the beads
from the zip file and add them to the ropes,
making sure each bead has it's own layer named
bead2 through how ever many beads you add this
is so you can use the deformation tool to move
them to fit right on the rope and scale them to
fit on the ropes.
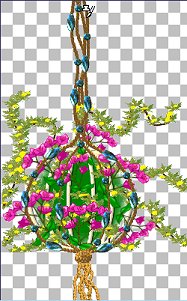
36.) Go to Layers/Merge/Merge Visible,
rename it moss planter.
37.) You may save this as a tube or put a
background behind it and add a frame.
___________________________________________________
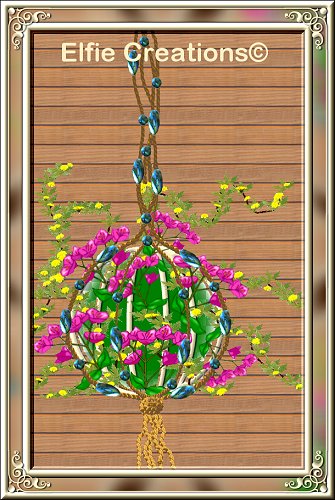
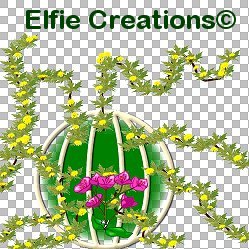
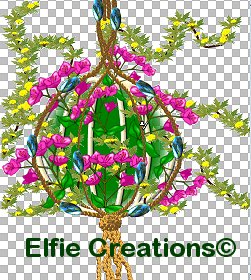
Now you have just created a pretty kewl Moss Planter.
Hope you enjoyed this tutorial and have fun!
Click On Button
To Email Me!
You may turn off the
sound by clicking on the
little square somewhere at
the top of this page.
~ Music: Unknown ~
|