___________________________________________________
Making An Old Fashioned Sideboard In PSP
___________________________________________________
You will need PSP for this tutorial to get
the latest version of PSP for a free trial
to play with for 30 days download it here.

You will need NVR BorderMania Filter
here.
After you have saved and installed it
to your plugins folder then open PSP.
___________________________________________________
Make the Window
___________________________________________________
1.) Open New Image size 500 x 500 transparent 16 mil.
colors.
2.) Add new raster layer. Rename Layer1 background.
Make Layer2 active.
3.) Using your selection tool set on rectangle
make a rectangle in the upper portion of the
image and flood fill it with a color you like
I used a cream color = #FFFAE7.
Don't forget to save it often!
4.) Go to Selections/Modify/Contract by 20 and
hit delete on the keyboard.
5.) Use the magic wand select the frame and go to
Effects/Plug-in Filters/
NVR Border Mania/Frame #2 set at:
Border Width = 20
Frame Width = 24
Highlight Intensity = 110
Shadow Intensity = 130
Bevel box is NOT checked
Notch Corners box IS checked.
Deselect.
6.) Use your magic wand again and select the
center of this frame go to Selections/Modify/
Expand by 1 and flood fill it with a color of
your choice this is the main color.
I used a country blue = #629BCC.
7.) Repeat 4 - 6, change the setting on the NVR
Border Mania Frame Border Width to 24. Deselect.
Using the draw tool set on round single line,
size 1 draw a line from inner corner to outer
part of corner do this on all corners, make it
a darker color of your main color. I used #376E9D
8.) Repeat 6 but do not flood fill it this time.
9.) Add new raster layer and flood fill it again with
the first color mine is the cream color = #FFFAE7.
Repeat 4 only this time make it 10 and Deselect.
10.) Add new raster layer and using your draw tool set
on Single Line, size = 10 Default Line Style,
Antialias box IS checked find the center of your
middle frame on the horizontal holding down the
shift key draw a single line across to the other
side of your center frame now draw two lines evenly
space from the top of the center frame to the bottom
of the center frame remember to hold down the shift
key this will make the line go straight.
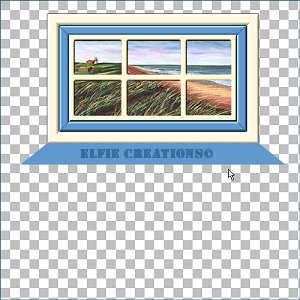
This is what it should look like now.
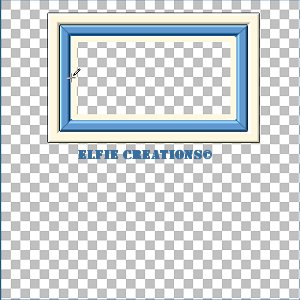
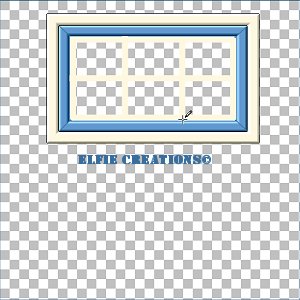
11.) Hide all layers but the center frame and
the cross bars Merge/visible.
12.) You may rename this layer window frame center
and then rename the frame layer window frame
the first layer is background.
13.) Now select your window frame center cross
bars with your magic wand.
14.) Go to Effects/3D Effects/Inner Bevel set at:
Bevel Shape = Round Row #1 Shape #2
Width = 2
Smoothness = 8
Depth = 8
Ambience = 0
Shininess = 40
Color = (use the one you made the frame
in I used the cream color = #FFFAE7.)
Angle = 315
Intensity = 50
Elevation = 30
Deselect.
(After beveling you may have to use the
Deformation tool to pull the center
to the edge of the frame so there are no gaps.)
15.) Make your window frame layer active,
using the magic wand again select inside
the frame.
16.) Add a new raster layer.
Find a picture you like and copy it
then paste into selection. Deselect.
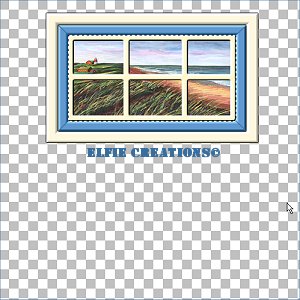
17.) Now hide the background layer and
Merge/Visible then rename it window.
___________________________________________________
Adding The Top
___________________________________________________
18.) Add new raster layer and name it top.
Make a smaller rectangle same size as window
and about half the size of the height of the
window. Flood fill it with your main color I
used #629BCC.
Deselect.
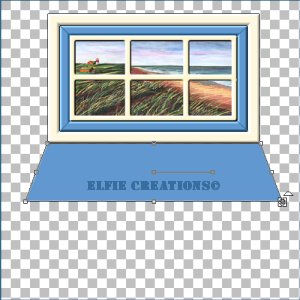
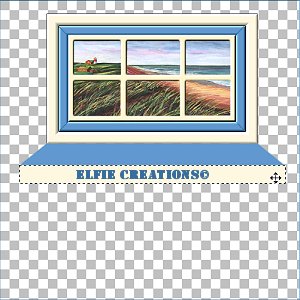
19.) Using the deformation tool while holding down
the Ctrl key select one of the bottom corners
and pull it out to the side not up or down and
push the center in so it's about half the size.
___________________________________________________
Adding The Front Board
___________________________________________________
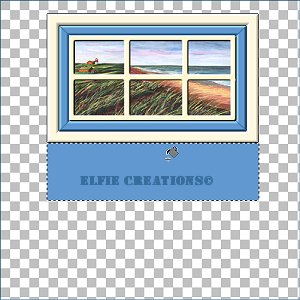
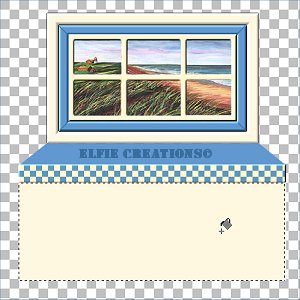
20.) Add new raster layer and rename it front board.
21.) Now using the selection tool on rectangle make
a rectangle from the top to about two squares
down on your background grid across the front
to the other side and flood fill it with your
color I used #629BCC.
___________________________________________________
Making The Background For The Front Board
___________________________________________________
22.) Open a new image size 20 x 20 forground main
color I used the country blue = #629BCC and
using the paint brush tool set at size 10 square
make a checker board look by painting a square
in the upper left corner and the lower bottom
corner with your lighter color I used my cream
color #FFFAE7. Save as... name it checkedbg.jpg.

23.) Use this new background image as your pattern
flood fill the front board with it.
Repeat 14 inner bevel.
Deselect.

___________________________________________________
Adding The Front
___________________________________________________
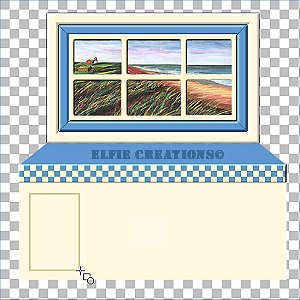
24.) Add new raster layer and name it front.
25.) Using the selection tool on rectangle make
a rectange across the front down to about
1 1/2 to 2 squares from the bottom of image
and flood fill it with your light color I
used cream #FFFAE7.
Deselect.
___________________________________________________
Adding The Doors
___________________________________________________
26.) Add new raster layer name it door.
27.) Using the shapes tool set on rectangle shape
make the background color your light color
and the forground color a daker color of it.
I used cream = #FFFAE7 and my dark color =
#D6C380. Set the line width to 2.
28.) Draw a rectangle on the left side evenly spaced
away from the left side, top and bottom.
Repeat14 inner bevel.
29.) Add new raster layer and name it door knob.
30.) Using the shapes tool on Elipse with the main
color as your background and nil (Circle with
line through it.) as your forground make a
small circle on the right side of your door.
(I used country blue again = #629BCC.)
31.) Repeat 14 inner bevel and add a slight drop
shadow. Hide all layers but door and door knob
and merge/visible rename it door.
Un-hide layers and add a slight drop shadow to
it the door.
___________________________________________________
Adding The Door Design
___________________________________________________
32.) Add new raster layer and name it door design.
Now keep the colors the same no foreground and
main color as background go to your fonts and
find a dingbat or design of your choice it should
look like the old designs that where used on
country kitchens but you use what you like, LOL.
Make it small enough to fit on the top portion
of the door. Deselect.
I used Fleurons = ceC as you can see I used the
same ones for the divider.

33.) Hide all layers but the door and design
merge/visible rename it door. Un-hide layers.
34.) Go to your layers and duplicate this layer
three times. Select one of the duplicates
and go to image/mirror repeat this on one
more duplicate and move it next to your first
door, move the last duplicate next to the
first mirrored door. Use the deformation
tool to move them.
35.) Hide all layers but the doors and merge/visible
rename it doors. Un-hide all layers.
36.) You may want to add a design in the center
between the doors. Add a new raster layer
and repeat the same design between the doors.
Hide all layers but the front layer and design
between the doors and rename it front.
37.) Now your done with the sideboard and you may
merge/merge all flatten and save as... name it
a gif. You can save it as a tube file if you
like also.
___________________________________________________
Adding The Curtain Rod & Curtains
___________________________________________________
38.) Add new raster layer and name it curtain rod.
39.) Make it across the top center it in the top
portion of the window frame make it thin like
a rod and not to close to the edges. Give it
a slight drop shadow.
40.) Add new raster layer and name it curtain.
41.) Using the lasso tool make a curtain shape and
flood fill it with a pattern you like that
will go with your sideboard colors. I used my
checked background. Add new raster layer name
it lines and draw wavy lines down your curtains
then go to Effects/Blur/Gaussian Blur set at
about 2.00 hide all layers but the curtain and
the lines merge/visible and rename it curtain.
42.) Duplicate this layer and mirror it now you have a
pair of curtains hide all layers and merge/visible
the two curtain layers and rename it curtains.
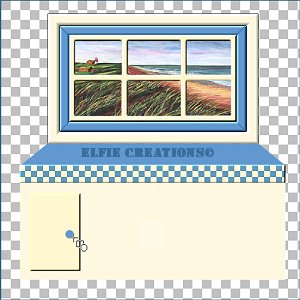
43.) You may add new raster layers and put tube images
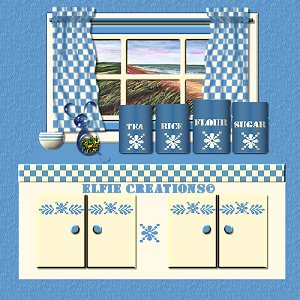
on each layer then merge all and save as a gif
or tube it or both. As I did on the above image
and finished image below.
___________________________________________________
Now you have just created a pretty kewl Old
Fasioned Sideboard.