___________________________________________________
Making A Collectors Plate Rack In PSP 8
___________________________________________________
You will need PSP for this tutorial to get a free
trial of the latest version to play with for 30 days
download it here.

If you have PSP 9 don't worry everything is in
the same palce for it as they are for PSP 8.
You may be able to adapt this one for all of the
PSP 7 versions just as long as you know where
everything is you should be able to do it.
___________________________________________________
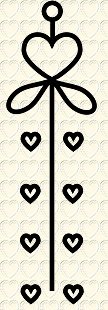
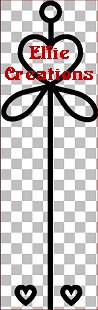
Make the Rack Back
___________________________________________________
1.) Open new image transparent 16 mil.
colors size 1000h x 350w rename
layer1 background.
2.) Add new raster layer and name it rack top circle.
3.) Using the Shapes tool set on Ellipse and
foreground color on black and no
background color line with circle in it.
4.) Draw a small circle at the very top of the image.
5.) Add new raster layer and name it rack bar.
6.) Click on the (draw tool in PSP7.02) pen tool
(Skip this for PSP7.02) and check the
box Contiguous, Simple Mode, click on the pencil,
Segment Type = Line, (Start here in PSP7.02) Line
Style = (Default) Solid, Width = 15.00, Anti-alias
box IS checked, (Skip this in 7.02) Join = Miter join,
Miter limit =15.
7.) While holding down the shift key draw a straight
line down from the circle.
8.) Hide background layer by clicking on the (glasses)
eye and right click on one of the other layers and
scroll down to Merge/Merge Visible and rename the
layer Rack bar.
9.) Add new raster layer and name it heart.
10.) Using the shapes tool as before in 3 only this
time use the heart 1 shape and draw a
heart on the bar not too close to the circle
and under it. Select the inside of the heart
with the magic wand and make the Rack bar layer
active and hit the delete key on your keyboard.
11.) Add new raster layer and name it design 1.
12.) Using the shapes tool as before in 3 only this
time use the tear drop shape and draw a small
tear on the left side of the bar draw a tear
close to the bottom of the circle.
13.) Go to Image/Rotate/Free Rotate set on Right,
all layers box NOT checked, Free = 55.00,
(skip this for PSP7.02.) Rotate single layer
around canvas center box NOT checked.
(You may have to change the number also to like
45 in PSP7.02.)
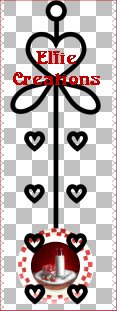
14.) Use the mover tool to position it on the bar and
right under the heart. (You may omit the heart
shape and jus use the circle as the samples on
the top of this page show with the plates on them.)
15.) Duplicate this layer and rename it design 2.
16.) Go to Image/Mirror.
17.) Hide the background layer and merge/merge visible
rename merged layer rack bar.
___________________________________________________
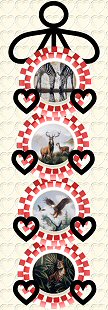
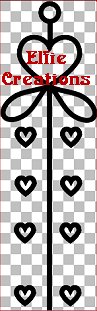
Adding The Plate Holders
___________________________________________________
18.) Add new raster layer and name it holder 1.
19.) Using the shapes tool as before in 3 only this
time use the heart shape and draw a small
heart on the left side leaving a space between
the bar draw a heart close to the bottom
with heart shape 1.
20.) Go to the layer palette and right click on the
holder 1 layer and scroll down to duplicate
rename the duplicate layer holder 2 and go to
Image/Mirror.
21.) Now hide the background and rack bar and merge/
visible rename the merged layer holder 1.
22.) Duplicate this layer rename it holder 2
and move the duplicate above holder 1.
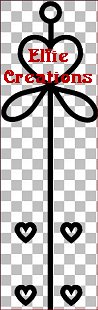
23.) Repeat 22 move the layer above holder 2
and rename it holder 3.

24.) Repeat 23 and rename it holder 4.
Save as plate rack as a psp file so you
can add different plates to it by using
this as a template and duplicating it then
add the plates.
___________________________________________________
Adding the Plates
___________________________________________________
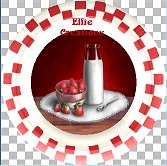
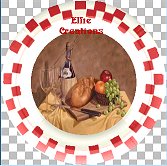
25.) Now open your first plate and go to Edit/Copy
now paste this as a new layer and rename
it plate 1 move this layer so that holder 1 layer
is visible in front of the plate and resize
this layer by going to Image/Resize set at:
Width = 75
Height = 75
Percent
Skip the print size boxes
Resample using = Smart Size
Maintain original print size box NOT checked
Lock aspect ratio = (default) 0.3500 to 1
Resize all layers box NOT checked.
(You may have to change this to what size
plate you like on the rack.)
26.) Hide all layers but plate 1 and holder 1 Merge/
Merge visible rename merged layer plate 1.
27.) Un-hide layers and open plate 2 and repeat 25
with this plate hide all layers but plate 2
and holder 2 Merge/Merge visible rename merged
layer plate 2.
28.) Repeat as before with plate 3 and
holder 3 rename merged layer plate 3.


29.) Repeat as before with plate 4 and and
holder 4 rename merged layer plate 4.

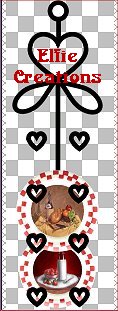
30.) Now using the mover tool position
the layers evenly up the rack bar.
31.) Hide background layer and merge/merge
visible rename layer plates and rack.
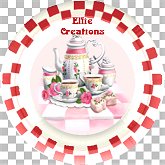
31.) Save as a tube or gif or put a background
behind it and save as a jpg.
___________________________________________________