Free Web Site - Free Web Space and Site Hosting - Web Hosting - Internet Store and Ecommerce Solution Provider - High Speed Internet
Search the Web
WELCOME TO 3D BACKGROUND TUTORIAL

.................... Elfie Creations © .................... Welcome To PSP 7 ... 3D Background Tutorial ....................

^You May Start The Tutorial By
Reading Everything On This Page First^

chrome_bar-ec.jpg

_______________________________________________________________________

~ Making A 3D Background For Your Web Pages Or Stationery In PSP ~

_______________________________________________________________________

This tutorial was created in PSP version 7.02.

You may download the latest version of PSP for this
tutorial it's a free trial to play with for 30 days
download it here.

PSP 8

You will also need the Plug-in Filter Factory A
- Kaleidoscope for this tutorial go get it here.

You will also need the Plug-in Filter Simple
go get it here:
Simple Filters

NOTE: Sometimes the links are old and no longer
available you can usually do a search to find the one you need.

Filters use a format originally designed
for Adobe Photoshop, PSP can read this format,
but it needs an additional file called msvcrt10.dll
to be placed in the Windows/System folder.
If you don't have it you can get it here.

Disclaimer: This is my own idea any similarity to any other
Tutorial is purely coincidental.

You may be able to adapt this tutorial for other
PSP versions also. Elfie Creations © <<;-)

________________________________________________________________________

3D Background

________________________________________________________________________

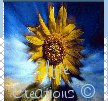
1.) Open an image of your choice or use mine below
just right click on it and save it to your hard drive
I find it easier to make a folder for the whole tutorial
that way I have everything I need in one place.
Now open this image in PSP and Duplicate it Shift +D
close the original and use the copy, now size it to 100 x 100

Sunflower Image

3D Image 1

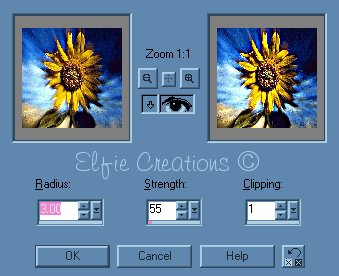
2.) Go to Effects/Sharpen/UnSharp/ Mask set at: Radius = 3.00 Strength = 55 Clipping = 1

Un-Sharp Mask Setting

3.) Go to Effects/Plug-in Filters/ Filter Factory A/Kaleidoscope set at: Default Divisions = 224 Rotations = 19.

Kaleidoscope Setting

3D Image 1

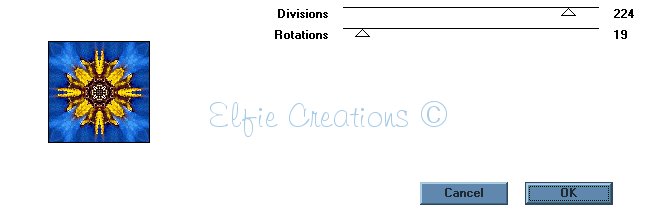
You now should have something like this.

4.) Go to Effects/Plug-in Fiters/Simple/Quick Tile.

3D Image 1

This should be something like what you end up with.

Hope you enjoyed this little tutorial and had fun!

_________________________________________________________________________________

divider

ElfQueenOfShannara@hotmail.com
Click On Button
To Email Me!

divider

Back To Country Bench Tutorial
 
Home Page
 
Next To Basket Weave Background Tutorial Page

divider


Terms of Use:
Please feel free to use the tutorial final
project how ever you like.

Do not send this through email as the person
receiving it will not see all the backgrounds.
Please only send the link to this page.
You may copy this page onto your own PC for
your own use but, Please do not use this
tutorial as your own for web site, download
or in a CD or in any other way! Thanks!
<<'-)
Char
Elfie Creations©

Elfie Creations © created all
Bordertiles Backgrounds, Bars & Buttons
on this page.

<-- OE5 Sound Script
You may turn off the
sound by clicking on the
little square on the controls
 
~ Music: Wind Chimes ~