|
|
|

^You May Start The Tutorial By

|
|
_______________________________________________________________________
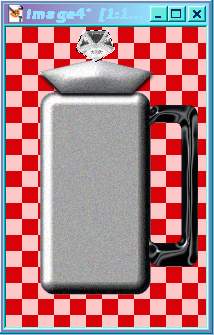
Making A Cook Stove Coffee Pot In PSP
_______________________________________________________________________
This tutorials was done with PSP 7.02
You will need PSP for this tutorial to get a free
You will also need Eye Candy 4000 or equivalent
Note: I'm sorry to say the filter I used in the check it out here.
You will also need Super Blade Pro or Blade Pro by
Note: If you have Super Blade Pro or Blade Pro and check it out here.
NOTE: You may be able to adapt this tutorial
Disclaimer: This is my own idea any similarity to
I did all the hard parts for you, LOL!
Get the Selections
here
Get the Super Blade Pro & Blade Pro Presets
here ________________________________________________________________________ Coffee Pot Body ________________________________________________________________________
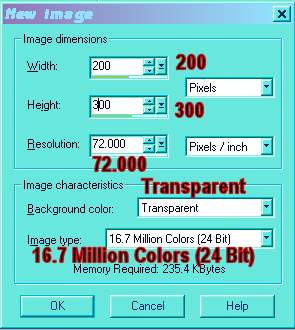
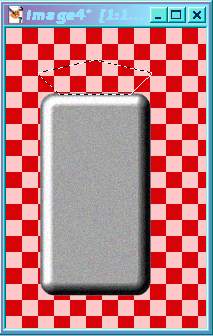
1.) Open New File 200 x 300 Transparent 16 mil. colors (24 bit)
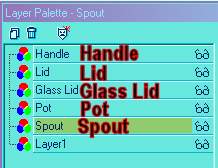
2.) Add a new Layer and name it "Pot" 3.) Selections/Load From Disk/EC_Coffee_Pot_Body.sel
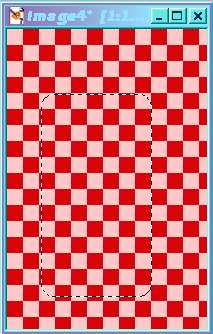
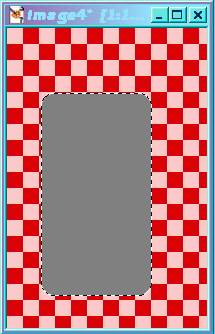
4.) Flood fill with medium gray color,
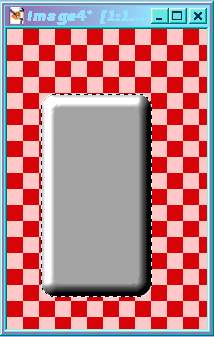
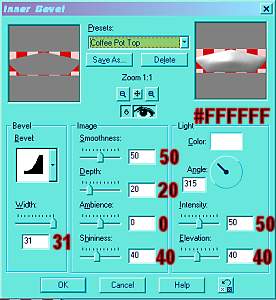
5.) Go to Effects/3D Effects/Inner Bevel/Pre-set ~ Coffee Pot
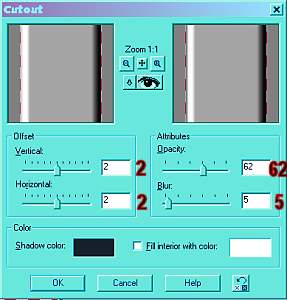
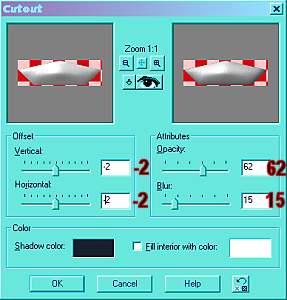
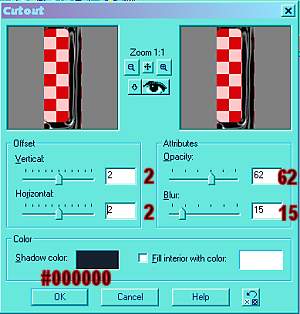
6.) Selections/Float 7.) Go to Effects/3D Effects/Cutout/Settings set at: See Example Below.

8.) Go to Effects/3D Effects/Cutout/Settings set at: See Example Below.
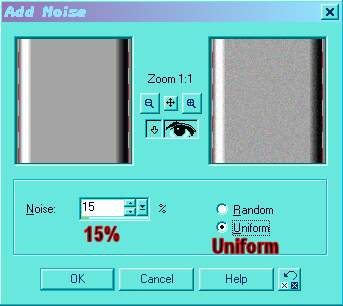
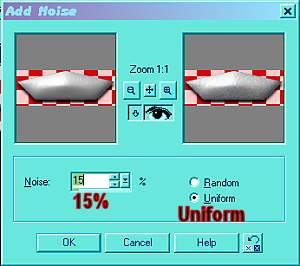
9.) Effects/Noise See Settings Below
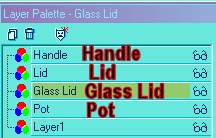
10.) Selections/Select None. _________________________________________________________________________________ Coffee Pot Lid _________________________________________________________________________________ 1.) Add a new Layer and name it "Lid" 2.) Go to Selections/Load From Disk/EC_Coffee_Pot_Lid.sel
3.) Flood fill with medium gray color, I used the standard #808080.
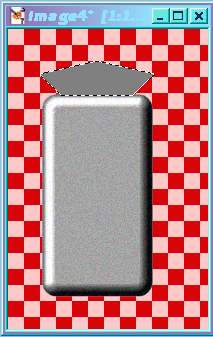
4.) Go to Effects\3D EffectsInner BevelPre-set
5.) Selections/Float 6.) Go to Effects/3D Effects/Cutout/Settings set at: See Example Below.
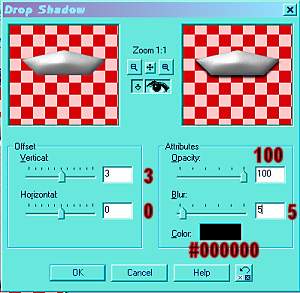
7.) Go to Effects/3D Effects/Drop Shadow/Settings set at: See Example Below.
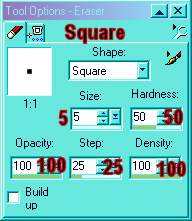
9.) Effects/Noise See Settings Below
10.) Selections/Select None ____________________________________________________________________________________ Coffee Pot Handle ____________________________________________________________________________________ 1.) Add a new Layer and name it "Handle" 2.) Go to Selections/Load From Disk/EC_Coffee_Pot_Handle.sel
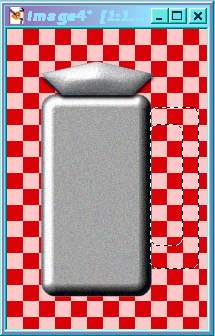
3.) Flood Fill with Black = #000000.
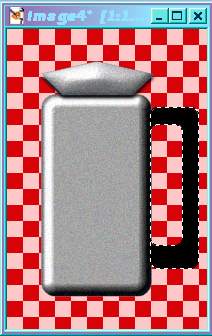
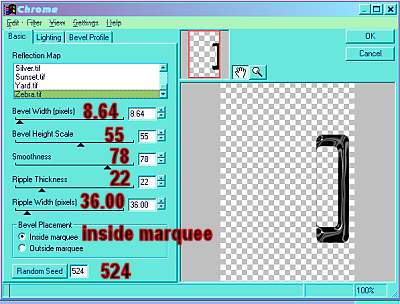
4.) Effects/Plug-in Filters/Eye Candy 4000/Chrome/Black Latex.
4.a.) Effects/Plug-in Filters/Flaming Pear/
5.) Erase the thin line next to the Coffee Pot Body,
6.) Selections/Float 7.) Go to Effects/3D Effects/Cutout/Settings set at: See Example Below.
8.) Selections/Select None. ____________________________________________________________________________ Coffee Pot Glass Top ____________________________________________________________________________ 1.) Add a new Layer and name it "Glass Top" 2.) Go to Selections/Load From Disk/EC_Coffee_Pot_Glass_Top.sel
3.) Flood Fill with White = #FFFFFF.
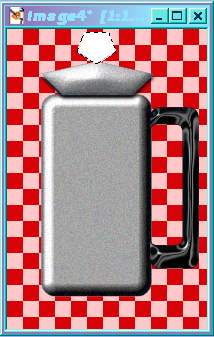
4.) Effects/Plug-in Filters/Flaming Pear/
5.) Selections/Select None.
6.) Drag Glass Top layer below Handle and
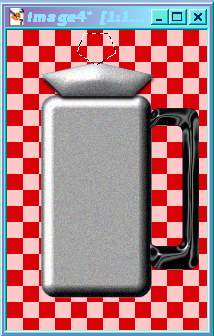
___________________________________________________________________________________________ Coffee Pot Spout ___________________________________________________________________________________________ 1.) Add a new Layer and name it "Spout" 2.) Go to Selections/Load From Disk/EC_Coffee_Pot_Spout.sel
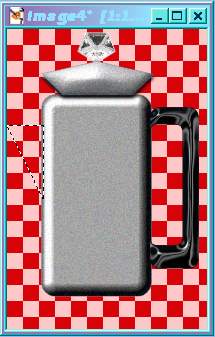
3.) Flood fill with medium gray color,
4.) Go to Effects/3D Effects/Inner Bevel/

5.) Selections/Float 6.) Go to Effects/3D Effects/Cutout/Settings set at: See Example Below.
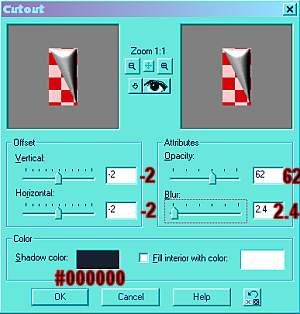
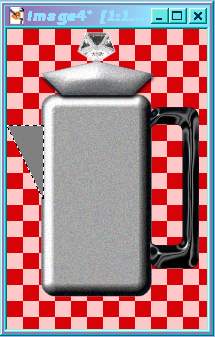
7.) Go to Effects/3D Effects/Cutout/Settings set at: See Example Below.

8.) Selections/Select None. 9.) Drag Spout layer below Pot layer.
_____________________________________________________________________________

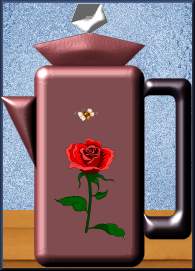
Now you have just created a pretty Hope you enjoyed this tutorial and had fun!
If You think this one was good then you can
Disclaimer: You may do what ever you like with the finished image!
Do not copy this tutorial for your own web
created all backgrounds & graphics on this page. sound by clicking on the little square button some where at the top of this page. |