___________________________________________________
Making A Glass Door In PSP
___________________________________________________
This tutorial was done in PSP 7.02

You will need PSP of course for this tutorial
if you don't have it you can get a free trial
of the latest version of PSP to play with for
30 days download it by clicking on the logo:
The tools are not all in the same places as
in PSP 7.02

You may skip downloading the Selections zip file
if you want to this tutorial starts the hard way
the selections tutorial will be on page 3.
You will need my Selections zip file if you decide
not to make it the hard way get them
here.
Save the zip file then open and install it to your
selections folder in PSP.
You will need my glass insert zip file get them
here.
save the zip file then open and save the glass
patterns to your patterns folder in PSP, save the
inserts to your working tutorial folder.
You will need my glass door hinge zip file get it
here.
save the zip file then open and save it to your
working tutorial folder then open it in PSP.
You will also need Super Blade Pro or Blade Pro
by Flaming Pear for this tutorial if you want to
use my presets to get a free trial to play with for
15 days.
check it out here.

If you want to use Blade Pro or Super Blade Pro
you will need my preset clear glass-ec.q5q or clear
glass-ec.q9q and cut crystal glass.q9q or cut crystal
glass.q5q get it
here.
save the zip file then open and save it to your
working plug-ins folder clear glass-ec.q9q & cut
crystal glass.q9q to Blade Pro/environments and
textures or clear glass-ec.q5q & cut crystal glass.q5q
to Super Blade Pro/environments and textures then open
either of the ones you have in Blade Pro or Super Blade
Pro in PSP.
If you don't have BP or SBP and you don't want to use
the glass pattern Download this zip file of the knob
here
unzip and save it to your Hard Drive in your tutorial
working folder.
(Note: You may also use this knob as a diamond gem for
other projects.)
___________________________________________________
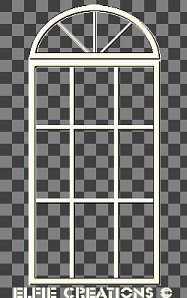
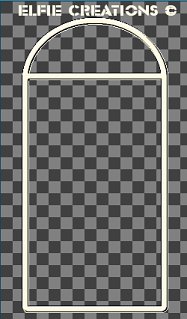
Making the Top Window Frame
___________________________________________________
1.) Open new image size 500w x 850h transparent 16 mil.
colors.
2.) Add new raster layer and name it Top Frame.
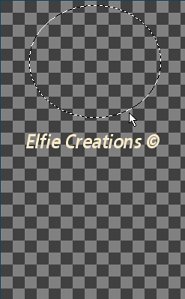
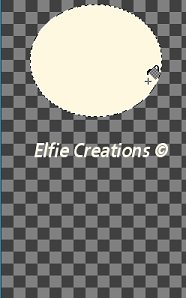
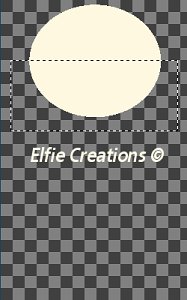
3.) Using the Selection tool set on elipse Draw an
elipse in the top portion of the canvas and flood
fill with a cream color I used = #FFFAE7. Deselect.
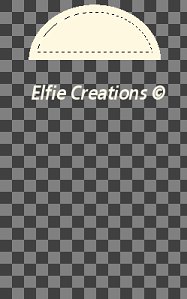
4.) Using the Selection tool set on rectangle find the
center of your oval image and go across it to the
oposite side and past the bottom make sure you get
all the bottom and sides of it in the selection and
hit delete on your keyboard you now have a half circle.
save as a psp file.
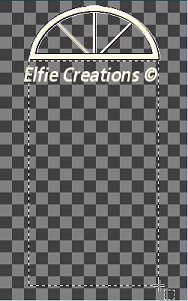
5.) Go to Selections/Select All and Selections/Float
Selections/Modify Contract by 20 and hit delete on
your keyboard, then Selections/Invert and Selections/
Float.
6.) Go to Effects/3D Effects/Inner Bevel Set at:
Preset Name = Groove
Bevel Shape = Vee Row #2 Column #4 Shape #8
from left to right.
Width = 4
Smoothness = 0
Depth = 5
Ambience = 0
Shininess = 0
Color = White
Angle = 315
Intensity = 50
Elevation = 30
Deselect.
7.) Add new raster layer and name it Top Dividers.
Save as a psp file.
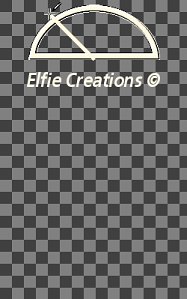
8.) Using the Draw tool (pencil) set on Single Line,
Width = 10, Line Style = Default Antialias box IS
checked, create as Vector box NOT checked, Close
Path box NOT checked. Make sure your cream color
is in the forground Styles box and no background
color is selected.
9.) Holding down the Shift key find the center just below
the bottom of your top frame and draw a slanted line
to the left again to the right and again in the center,
make it go over the edges so we don't have gaps.
Save as a psp file.
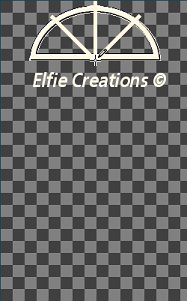
10.) Now make the top frame layer active and use the
magic wand to select outside the frame image.

11.) Now make the top dividers layer active and hit delete
on the keyboard, this will erase all the lines edges
that go outside the frame. Deselect.
12.) Repeat 6 Inner bevel and move this layer below the
top frame layer.
13.) Hide Layer 1 and merge visible rename it top frame.
Save as a psp file.
___________________________________________________
Adding The Bottom Door Frame
___________________________________________________
14.) Add new raster layer and rename it Main Frame.
15.) Using the selections tool set on rectangle start
at the top bottom edge of your top frame and over
to the opposite edge and all the way down to a little
above the bottom of your canvas and flood fill with
the cream color.
16.) Go to Selections/Modify/Contract by 20 and hit delete
on the keyboard, Selections/Invert, Selections/Float.
17.) Repeat 6 Inner bevel. Deselect. Save as a psp file.
18.) Add new raster layer and name it main frame divider.
19.) Using your draw tool set the width for 15 and holding
down your Shift key find the draw two vertical lines
evenly spaced past both ends an easier way to do this
is to duplicate the first vertical layer and move them
into position with the mover tool.
Hide all layers but the divder layer and the copy and
merge visible rename vertical dividers.
20.) Repeat 6 Inner bevel. Save as a psp file.
21.) Select the Main Frame layer and using the magic wand
select outside of the image go back to the vertical
dividers layer and hit the delete key on the keyboard.
Deselect and move the layer below the main frame layer.
22.) Add new raste layer and rename it horizontal dividers.
23.) Using the Draw tool divide the Main frame so that you
have three open spaces and 2 lines evenly spaced.
Remember to hold the Shift key as you draw this will
make your lines draw straight, make sure they are past
the edges of the main frame also. An easier way to do
this is to duplicate the first horizontal layer and move
them into position with the mover tool. Hide all layers
but the divder layer and the copy and merge visible rename
horizontal dividers.
24.) Repeat 6 Inner bevel. Save as a psp file.
25.) Make the main frame active and using the magic wand
select outside the main frame image make the dividers
layer active again and hit your delete key on your keyboard.
Deselect.
Use your selection tool and select the center of the
horizontal line dividers that cross the vertical lines
and click on it to select just that section then hit the
delete key on your keyboard.
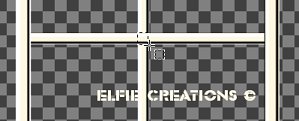
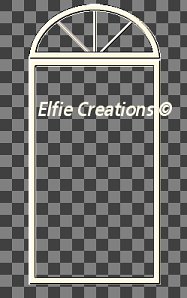
You should now have something like this:
26.) Hide the Top Frame layer and layer1 and merge visible
rename it main frame.
Un-hide all layers. Save as a psp file.
___________________________________________________
Adding The Glass To The Door
___________________________________________________
27.) Add new raster layer rename it glass insert.
28.) Open the glass insert image and copy it.
Make the main frame layer active.
29.) Using the magic wand select the middle opening
in the top of the main frame go to Selections/
Modify/Expand by 1 make the insert layer active
and paste into selection.
Deselect.
30.) Repeat 28 - 29 on the next two center openings.
Move the glass insert layer below the main frame layer.
31.) Make the main frame active go to layers palette
add new raster layer name it glass and open door
glass pattern, make the main frame active and using
the magic wand select the top left opening now go to
Selections/Modify/Expand by 1 make the glass layer
active again and copy glass and paste it into selection.
Deselect.
32.) Repeat 31 in all the rest of the door openings and move
the glass layer below the main frame layer.
Hide layer 1 and top frame layer merge layers vissible
and rename the layer main door window frame. Save as a
psp file.
___________________________________________________
Adding The Glass To The Top Door
___________________________________________________
33.) Make the top frame active and add a new raster layer
and Select each widow with the magic wand holding down
the shift key go to Selections/Modify/Expand by 1 and
flood fill with a gold pattern go to Selections/Modify
contract by 5 and flood fill with the frosted glass
pattern. Deselect.
34.) Hide all layers but the top and this layer and merge
visible rename it top frame.
___________________________________________________
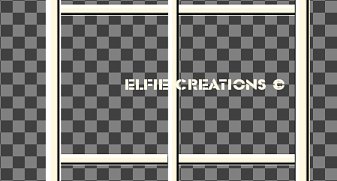
Adding The Door Frame
___________________________________________________
35.) Add new raster layer rename it Door Frame and make
the top frame layer active using the magic wand tool
select outside the frame go to Selections/Invert and
Selections/Modify/Expand by 20 and flood fill with
cream color = #FFFAE7.
36.) Go to Selections/Modify/Contract by 20 and hit delete
on your keyboard. Deselect.
37.) Make the main door window frame layer active using the
magic wand tool select outside the frame go to Selections/
Invert and Selections/Modify/Expand by 20 and make the door
frame layer active and flood fill the selection with the cream
color = #FFFAE7.
38.) Repeat 36. Deselect.
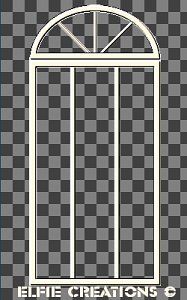
39.) Repeat 6 Inner bevel. Move door frame below main frame layer.
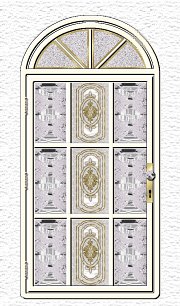
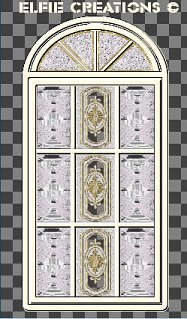
You should now have something like this:
Go on to finish the tutorial on
Page 2
___________________________________________________
FINISHED GLASS DOOR
___________________________________________________