___________________________________________________
This Glass Door Tutorial Was Made In PSP 7.02 Page 2
___________________________________________________
___________________________________________________
Adding The Door Hardware
___________________________________________________
40.) Select main door frame window layer and add
new raster layer and name it brass plate.
41.) Using the Shapes tool set on rectangle no forground
color and a gold pattern in background make a rectangle
in the center of the right side of the Main frame,
this is your door plate for the knob and keyhole.
42.) Go to Effects/3D Effects/Inner Bevel Set at:
Preset Name = soft flat edge
Bevel Shape = Flat Row #1 Column #2 Shape #5
from left to right.
Width = 2
Smoothness = 0
Depth = 4
Ambience = -30
Shininess = 0
Color = White
Angle = 315
Intensity = 50
Elevation = 60
Deselect.
43.) Add new raster layer name it knob and using the
shapes tool set on Octagon no forground color and
Frosted Glass pattern or Door Glass pattern as the
background make a knob in the upper portion of the
plate a little larger than the plate. You may want
to zoom in for this.
44.) Go to Selections/Select all, Selections/Float.
45.) Go to Effects/Plug-in Filters/Super Blade Pro/preset
clear glass.q5q this makes the knob look more like an
old glass knob. If you used the Door Glass pattern you
may omit this step also if you don't have Super Blade
Pro or Blade Pro.
46.) Add a slight drop shadow set at:
Vert. = 3
Horiz. = 3
Opacity = 50
Blur = 3.5 or so
Deselect.
47.) Add new raster layer and name it keyhole.
48.) Using the Shapes tool set on triangle no forground
color and black background color.
49.) Draw a small long triangle in the bottom center of the
brass plate. If you don't get it centered just move it
with the deformation tool or mover tool. Change to circle
or elipse shape and draw a small circle at the top of the
triangle and you may have to do it several times to get the
circle in place so just use your undo.You may want to zoom
in for this. You may use the deformation tool to pull in the
sides to make it more narrow.
50.) Hide all layers but the brass plate and keyhole merge
visible and rename brass plate.
50.) Hide all layers but the brass plate and keyhole merge
visible and rename brass plate.
Move the knob layer to the top of the layer palette.
51.) Hide layer1, door frame layer and top frame layer merge all
visible rename it glass door leave layer1 hidden an hide
glass door layer and merge door frame and top frame visible
rename layer door frame. Un-hide glass door layer.
52.) Open the hinge tube and copy it then paste as a new layer
postion it so it's in the upper portion of the left door edge
go to Image/Resize to 35% smart size resize all layers NOT
checked and duplicate the layer go to Image/Flip and move this
hinge to the lower portion of the left door edge duplicate the
layer again and flip move this hinge to the middle of the left
door edge.

53.) Hide all layers but the hinges and merge/visible rename
layer hinges.
54.) Repeat the drop shadow on this layer.
55.) You can merge all layers visible and tube it or merge all
layers visible but layer1 and flood fill layer1 with an image
and merge all layers flatten and save as a jpg image.
If you would rather do this Tutorial with Selections go to my
Page 3
___________________________________________________
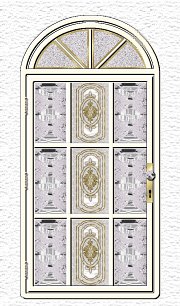
FINISHED GLASS DOOR
___________________________________________________